Quick Cost & Season Overview: Mera Peak 2026-2027
|
Cost Category
|
Budget Range
|
Premium Range
|
|
Total Package Cost
|
$2,699-$2,999
|
$3,200-$3,500
|
|
NMA Climbing Permit
|
$350 (Spring 2027)
|
$350 (Spring 2027)
|
|
NMA Climbing Permit
|
$175 (Autumn 2026)
|
$175 (Autumn 2026)
|
|
Flights (Kathmandu-Lukla)
|
$400-$450
|
$500-$550
|
|
Guide & Porter (15 days)
|
$500-$650
|
$800-$1,000
|
|
Accommodation & Meals
|
$300-$400
|
$500-$600
|
|
Travel Insurance
|
$150-$250
|
$200-$300
|
|
Gear Rental (if needed)
|
$200-$300
|
$400-$500
|
|
Best Months (2026-2027)
|
Sep-Nov 2026, Mar-May 2027
|
Same
|
Success Rate: 85-92% with proper acclimatization
Summit Altitude: 6,476 m (21,247 ft) - Nepal's highest trekking peak
Duration: 15-17 days (Kathmandu to Kathmandu)
Difficulty: Moderate - Non-technical but high altitude
What Makes Mera Peak Climbing Special?
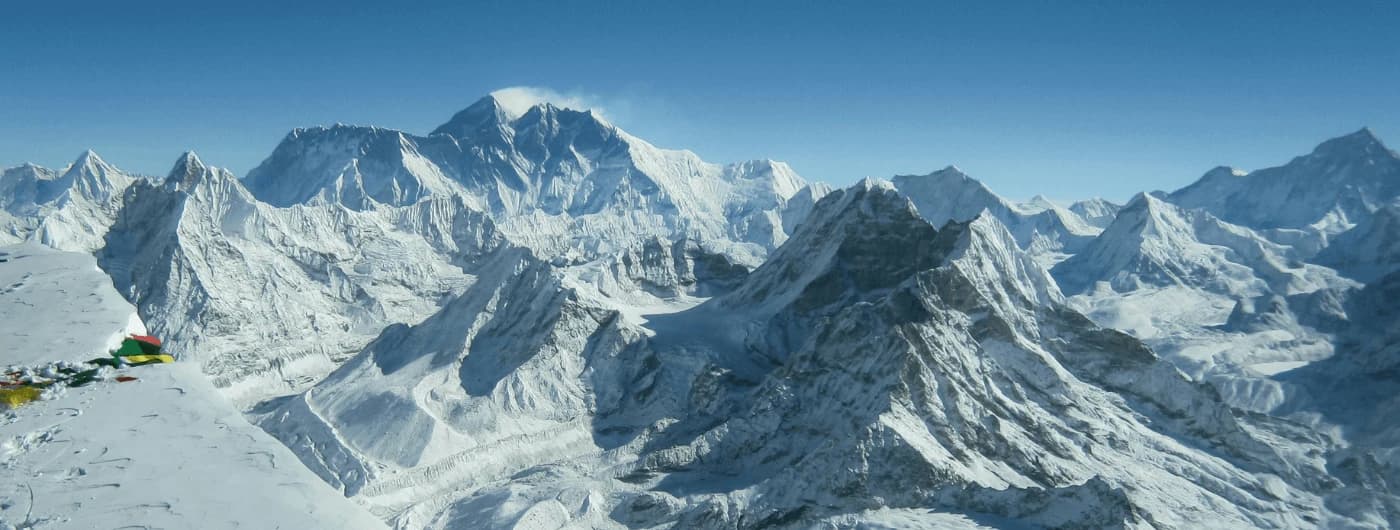
Mera Peak (6,476 meters/21,247 feet) stands as Nepal's highest trekking peak and one of the most accessible 6,000-meter summits in the Himalayas. Located in the remote Hinku Valley within the Mahalangur Himalayan range, Mera Peak offers climbers an extraordinary summit panorama featuring five of the world's 8,000-meter peaks: Mount Everest (8,849m), Lhotse (8,516m), Makalu (8,485m), Cho Oyu (8,188m), and Kanchenjunga (8,586m).
Unlike technically demanding peaks, Mera Peak does not require advanced rock or ice climbing skills, making it the perfect first Himalayan 6,000m summit for physically fit trekkers. The expedition combines stunning mountain scenery, Sherpa cultural immersion, and the genuine achievement of standing atop one of the world's great peaks.
Why climb Mera Peak in 2026-2027?
- Non-technical climbing route suitable for strong trekkers
- Unparalleled 360-degree summit views of Himalayan giants
- Remote Hinku Valley experience with authentic Sherpa culture
- Excellent preparation for higher technical peaks (Ama Dablam, Everest)
- High success rates (85-92%) with proper acclimatization
- Cost-effective compared to expedition peaks
Complete Mera Peak Climbing Cost Breakdown 2026-2027
Understanding the complete cost structure helps you budget accurately for your Mera Peak expedition. Here's a detailed breakdown of all expenses for the autumn 2026 and spring 2027 climbing seasons.
Mera Peak Permit Fees 2026-2027
The Nepal Mountaineering Association (NMA) issues climbing permits for Mera Peak with seasonal pricing:
Nepal Mountaineering Association (NMA) Climbing Permit:
- Spring 2027 (March-May): $350 USD per person
- Autumn 2026 (September-November): $175 USD per person
- Winter 2026-2027 (December-February): $200 USD per person
- Summer/Monsoon 2027 (June-August): $200 USD per person
Additional Required Permits:
Makalu Barun National Park Entry Permit:
- Foreigners: NPR 3,000 (approximately $22-25 USD)
- SAARC nationals: NPR 1,500
- Required because the Mera Peak route passes through Makalu Barun National Park
Khumbu Pasang Lhamu Rural Municipality Permit:
- All trekkers: NPR 2,000 (approximately $15-18 USD)
- Replaces the old TIMS card system
- Obtained at the Lukla entry checkpoint
Alternative: Sagarmatha National Park Permit (if approaching via the Everest side):
- Foreigners: NPR 3,000 (approximately $22-25 USD)
- A less common route, most expeditions use the Makalu Barun route
Total Permit Cost:
- Spring 2027: $287-312 USD per person
- Autumn 2026: $162-187 USD per person
Important Note: All permits must be arranged through a registered NMA member agency. Independent climbers cannot obtain climbing permits directly. Overland Trek Nepal is a licensed NMA member agency and handles all permit logistics.
Guide and Porter Costs 2026-2027
Hiring qualified guides and porters is mandatory under Nepal's trekking regulations and essential for safety and success.
Certified Climbing Guide Costs:
- Lead climbing guide: $40-60 USD per day
- Assistant guide/Sherpa: $30-40 USD per day
- 15-day expedition total: $600-900 USD for guide team
Porter Costs:
- Trekking porter (up to base camp): $25-35 USD per day
- High-altitude porter (base camp to high camp): $40-50 USD per day
- 15-day expedition total: $375-525 USD per porter
- Ratio: Typically 1 porter per 2 climbers
Climbing Sherpa for Summit Day:
- Summit climbing Sherpa: $300-400 USD fixed fee
- Roped to you on the summit attempt
- Provides rope fixing, route finding, and safety
What's Included in Guide/Porter Costs:
- Guide's food, accommodation, and insurance
- Porter's food, accommodation, and equipment
- Group climbing gear (ropes, ice screws, carabiners)
- Emergency communication devices
- First aid and oxygen for emergencies
Budget Range for 15-Day Mera Peak:
- Single climber with guide + porter: $975-1,425 USD
- 2 climbers sharing 1 porter: $725-1,000 USD per person
- Group of 4+ climbers: $600-800 USD per person (cost-sharing)
According to Nepal Tourism Board guidelines, all foreign trekkers must be accompanied by licensed guides on designated trekking routes, including peak climbing expeditions.
Accommodation and Meals Cost 2026-2027
Kathmandu Accommodation (Pre/Post Trek):
- Budget hotel: $25-40 USD per night (basic, clean rooms)
- Mid-range hotel (3-star): $50-80 USD per night (Thamel area)
- Boutique hotel: $100-150 USD per night (premium amenities)
- Typical requirement: 2-3 nights before and 1-2 nights after trek
Trekking Route Accommodation (Teahouses):
- Lower altitude (Lukla-Kothe, 2,800-3,600m): $5-10 USD per night
- Medium altitude (Thaknak-Khare, 4,350-5,045m): $10-15 USD per night
- High Camp (5,780m): Camping in tents (included in package)
- Room type: Twin-sharing, basic bedrooms with mattresses and blankets
Meals During Trek:
- Breakfast: $4-7 USD (porridge, eggs, bread, tea)
- Lunch: $6-10 USD (dal bhat, noodles, soups, fried rice)
- Dinner: $8-12 USD (dal bhat with unlimited refills recommended)
- Drinks: $2-5 USD (tea, coffee, juice, soft drinks)
- Snacks & energy bars: $3-6 USD per day
Daily Food Budget:
- Standard trekker: $25-35 USD per day
- Comfort trekker: $35-50 USD per day (including extras)
- 15-day trek total: $375-525 USD
Price Increases with Altitude: At higher elevations (Khare 5,045m and above), food prices increase 20-30% due to porter costs and limited supply. A dal bhat at Lukla costs NPR 500-600, while the same meal at Khare costs NPR 800-1,000.
Hot Showers & Amenities:
- Hot showers: $3-5 USD per shower (not included in room price)
- Battery charging: $2-3 USD per device per charge
- WiFi: $5-8 USD per day for data card (unreliable at high altitude)
Total Accommodation & Meals (15 Days):
- Budget: $300-400 USD
- Standard: $400-550 USD
- Comfort: $550-700 USD
Domestic Flights 2026-2027
Kathmandu-Lukla-Kathmandu Flights: The journey to Mera Peak begins with a scenic but crucial flight to Lukla, gateway to the Khumbu and Hinku regions.
2026-2027 Flight Costs (Updated):
- Kathmandu to Lukla: $200-250 USD per person, one-way
- Lukla to Kathmandu: $200-250 USD per person, one-way
- Round-trip total: $400-500 USD per person
Important Flight Information:
- Flight duration: 30-35 minutes (weather permitting)
- Departure airport: Tribhuvan International Airport (Kathmandu) OR Ramechhap Airport (4-5 hours drive from Kathmandu)
- Peak season (Oct-Nov, Apr-May): Most flights operate from Ramechhap to reduce Kathmandu airport congestion
- Weight limit: 15 kg checked baggage + 5 kg hand carry per person
- Excess baggage: $2-3 USD per kg additional
Alternative: Helicopter to Lukla:
- Private helicopter charter: $3,000-4,000 USD (up to 5 passengers)
- Shared helicopter seat: $600-800 USD per person
- Weather-independent, faster, but significantly more expensive
Flight Delay Contingency: Lukla flights are heavily weather-dependent. According to Nepal Civil Aviation Authority, Lukla experiences 30-40% flight delays during peak season.
Recommendations:
- Buffer days: Schedule 1 extra day before and after trek for weather delays
- Travel insurance: Must cover flight delays and trip interruption
- Flexible dates: Consider extending the Kathmandu hotel booking
Total Flight Cost: $400-550 USD per person (round-trip)
Gear and Equipment Costs 2026-2027
Mera Peak requires both trekking and basic mountaineering equipment. You can bring your own gear or rent in Kathmandu.
Essential Personal Gear Categories:
Mountaineering Boots:
- Purchase: $300-600 USD (double-layer, rated -30°C to -40°C)
- Rental in Kathmandu: $80-120 USD for a full expedition
- Brands: Scarpa, La Sportiva, Millet
- Critical requirement: Must be crampon-compatible
Climbing Equipment:
- Crampons (12-point): Purchase $80-150 / Rent $30-50
- Ice axe (60-70cm): Purchase $50-100 / Rent $20-30
- Climbing harness: Purchase $60-100 / Rent $15-25
- Helmet: Purchase $50-80 / Rent $10-15
- Carabiners & slings: Usually provided by guide/operator
Clothing System:
- Down jacket (-20°C rated): Purchase $150-300 / Rent $40-60
- Down pants: Purchase $120-200 / Rent $30-40
- Hardshell jacket (Gore-Tex): Purchase $200-400 / Rent $40-60
- Hardshell pants: Purchase $100-200 / Rent $30-40
- Base layers (2-3 sets): Purchase $100-150
- Fleece mid-layer: Purchase $60-100
- Insulated gloves & mittens: Purchase $80-150
- Warm hat, buff, balaclava: Purchase $40-60
Sleeping Gear:
- Sleeping bag (-25°C rated): Purchase $200-400 / Rent $50-80
- Sleeping pad: Purchase $60-120 / Often provided in packages
Accessories:
- Headlamp + extra batteries: Purchase $30-60
- Sunglasses (Category 4 glacier): Purchase $50-150
- Trekking poles: Purchase $40-80 / Rent $15-25
- Duffel bag: Often provided free by trekking companies
- Summit pack (35-40L): Purchase $80-150
Total Gear Costs:
- If purchasing everything: $1,500-2,500 USD (but you keep the gear)
- If renting in Kathmandu: $200-400 USD for a full expedition
- If you own 50% already: $300-600 USD additional purchases/rentals
Where to Rent in Kathmandu: The Thamel district has numerous gear rental shops:
- Shona's Alpine Rental
- Himalayan Guides Nepal
- Mountain Hardwear Store
- The North Face Kathmandu
Recommendation: Rent expensive items (boots, down suits) and purchase personal items (base layers, gloves, socks) for hygiene and fit.
Travel Insurance 2026-2027
Mandatory travel insurance must cover:
- High-altitude trekking up to 6,500 meters
- Emergency helicopter evacuation
- Medical treatment in Nepal
- Trip cancellation and interruption
- Lost/stolen baggage
- Repatriation of remains (unfortunately necessary)
Insurance Cost Ranges (2026-2027):
- Standard 2-week policy with altitude coverage: $150-250 USD
- Premium comprehensive coverage: $250-350 USD
- Annual policy with altitude extension: $400-600 USD
Factors Affecting Cost:
- Your age (60+ pays 30-50% more)
- Nationality and home country
- Coverage limits ($100,000 vs $500,000)
- Deductible amounts
Recommended Insurance Providers:
For International Travelers:
For European Travelers:
Critical Insurance Requirements:
- Altitude coverage: MUST explicitly state coverage above 6,000m
- Helicopter evacuation: From 6,000m+ altitudes costs $10,000-25,000
- "Mountaineering" or "peak climbing" must be included - standard trekking policies exclude this
- Emergency contact: 24/7 assistance hotline in English
What's Typically NOT Covered:
- Climbing above 7,000m (requires expedition insurance)
- Solo climbing without a guide
- Injuries sustained while intoxicated
- Pre-existing medical conditions (unless declared and accepted)
Average Insurance Cost: $180-280 USD for a 17-day Mera Peak expedition
Miscellaneous Expenses
Nepal Visa (On Arrival):
- 15 days: $30 USD
- 30 days: $50 USD
- 90 days: $125 USD
- Bring 2 passport photos and exact cash (USD)
Tips for Crew (Customary in Nepal): According to Trekking Agencies' Association of Nepal (TAAN) guidelines:
- Lead guide: $100-150 USD
- Assistant guide/Sherpa: $75-100 USD
- Porters: $50-75 USD per porter
- Kitchen crew (if camping): $40-60 USD per person
- Total tipping budget: $200-400 USD for full crew
Personal Expenses:
- WiFi and charging: $50-80 USD for full trek
- Hot showers: $30-50 USD (assuming 8-10 showers)
- Snacks and chocolate: $40-60 USD
- Beer/alcohol (lower altitudes only): $50-100 USD
- Souvenirs in Lukla/Kathmandu: $50-150 USD
Emergency Cash Reserve:
- Recommended: $300-500 USD extra cash
- For: Extended weather delays, emergency hotel nights, helicopter fuel surcharge, and medical costs
- ATMs in Lukla are unreliable; the last reliable ATM is in Namche Bazaar
Total Miscellaneous: $420-900 USD
Complete Mera Peak Cost Summary 2026-2027
Budget Breakdown (Per Person)
Package Tour with Overland Trek Nepal:
- Standard package: $2,699-2,999 USD
- Premium package: $3,200-3,500 USD
What's Typically Included: All climbing permits (NMA, Makalu Barun, Local)
- Domestic flights (Kathmandu-Lukla-Kathmandu)
- Experienced climbing guide + porters
- Full-board meals during trek
- Teahouse accommodation (twin-sharing)
- High Camp camping equipment
- Group climbing gear (ropes, ice screws)
- First aid kit + emergency oxygen
- Airport transfers in Kathmandu
- Duffel bag and company T-shirt
- Government taxes
What's NOT Included:
- International flights to/from Nepal
- Nepal visa ($50 USD)
- Travel insurance ($180-280 USD)
- Personal climbing boots and clothing
- Lunch/dinner in Kathmandu
- Hot showers and WiFi on trek
- Tips for guides and porters
- Personal expenses (snacks, drinks)
- Emergency evacuation costs (covered by insurance)
Independent Trekker Budget: If organizing independently through local contacts:
- Minimum budget: $1,800-2,200 USD
- Realistic budget: $2,200-2,800 USD
- Includes: All permits, guide, porter, flights, basic accommodation/meals
- Challenges: Permit acquisition requires agency, logistics management, higher risk
Group vs Solo Costs:
- Solo traveler (1 person): $3,500-4,000 USD (paying for full guide/porter)
- 2 people sharing: $2,900-3,200 USD per person
- 4+ people group: $2,699-2,800 USD per person (best value)
Luxury/Premium Option ($4,500-6,000 USD):
- Private helicopter to/from Lukla
- Professional photographer/videographer
- Satellite phone and WiFi
- Luxury hotels in Kathmandu
- Extra Sherpa support
- High-end camping equipment
Complete 17-Day Mera Peak Climbing Itinerary 2026-2027
This detailed itinerary is optimized for autumn 2026 (September-November) and spring 2027 (March-May) climbing seasons. The schedule includes proper acclimatization, pre-climb training, and weather contingency days.
Day-by-Day Mera Peak Itinerary
Day 1: Arrival in Kathmandu (1,400m / 4,592 ft)
- Activity: Airport pickup, hotel transfer, trip preparation
- Accommodation: Hotel in Thamel district (3-star included)
- Meals: Welcome dinner with Overland Trek Nepal team
- Preparation: Final gear check, permit paperwork, expedition briefing
- Optional: Explore Kathmandu's UNESCO World Heritage Sites (Durbar Square, Swayambhunath, Pashupatinath)
Important: Arrive at least 2 days before the flight to Lukla for acclimatization and flight buffer.
Day 2: Kathmandu Sightseeing & Trip Preparation (1,400m)
- Activity: Final gear purchases/rentals in Thamel, expedition briefing
- Accommodation: Hotel in Kathmandu
- Meals: Breakfast only (explore Kathmandu restaurants)
- Shopping: Last chance to buy snacks, batteries, and personal items
- Documentation: Verify all permits, insurance, and emergency contacts
- Early night: Rest before 6:30 AM, Lukla flight next morning
Day 3: Fly to Lukla (2,840m) & Trek to Paiya/Chutok (2,800m)
- Flying time: 30-35 minutes (weather dependent)
- Trekking time: 5-6 hours
- Elevation change: 2,840m → 2,800m (minimal, gentle start)
- Trail conditions: Well-marked path through pine and rhododendron forests
- Accommodation: Teahouse lodge (basic twin rooms)
Highlights:
- Spectacular Himalayan flight views (Everest, Lhotse visible on clear days)
- First day is gentle to allow Lukla altitude adjustment
- Meet porters and yaks for gear transport
- Evening: Guide briefing on the trail ahead
Note: Flights from Kathmandu to Lukla in peak seasons (Oct-Nov 2026, Apr-May 2027) often depart from Ramechhap Airport (4-5 hour drive from Kathmandu starting at 2 AM). Overland Trek Nepal provides comfortable transportation.
Day 4: Paiya to Panggom (2,846m / 9,337 ft)
- Trekking time: 5-6 hours
- Elevation gain: +46 meters
- Trail: Undulating path alongside Inkhu River
- Difficulty: Moderate with several ups and downs
- Accommodation: Basic teahouse
Highlights:
- Cross suspension bridges over turquoise glacial rivers
- Pass through traditional Sherpa and Rai villages
- Views of Kusum Kanguru (6,367m) emerging
- Acclimatization: Gradual altitude gain strategy begins
Day 5: Panggom to Ningsow (2,863m / 9,393 ft)
- Trekking time: 4-5 hours
- Elevation gain: +17 meters
- Trail: Gentle ascent through rhododendron and bamboo forests
- Accommodation: Teahouse lodge
Highlights:
- Spring blooms (rhododendrons in March-April)
- Wildlife spotting opportunities (Himalayan Tahr, colorful birds)
- Quieter, less-traveled route than the Everest Base Camp trail
- Evening: Rest and hydration focus
Day 6: Ningsow to Chhatra Khola (2,800m / 9,186 ft)
- Trekking time: 7-8 hours (longest day so far)
- Elevation: Slight descent to 2,800m
- Trail: Remote valley trekking through forests and clearings
- Accommodation: Basic camping or simple lodge
Highlights:
- Deep wilderness experience
- Possible mule train encounters (supplying higher villages)
- Rest at a lower altitude before a significant climb ahead
- Prepare physically and mentally for altitude gain starting tomorrow
Day 7: Chhatra Khola to Kothe (3,691m / 12,109 ft)
- Trekking time: 6-7 hours
- Elevation gain: +891 meters (significant acclimatization step)
- Trail: Ascent through Hinku Valley alongside the river
- Accommodation: Teahouse (last comfortable lodges before base camp)
Highlights:
- Entering the heart of Hinku Valley
- First clear views of Mera Peak's southern approach
- The tree line begins to disappear
- Evening: Monitor for altitude symptoms (headache, nausea)
Acclimatization Note: This is your first significant altitude gain day. Drink 3-4 liters of water, avoid alcohol, and sleep well.
Day 8: Kothe to Thaknak (4,358m / 14,298 ft)
- Trekking time: 3-4 hours (short day for acclimatization)
- Elevation gain: +667 meters
- Trail: Gradual climb following Hinku River, rocky moraine terrain
- Accommodation: Basic teahouse (limited facilities)
Highlights:
- Views of Mera Peak, Kusum Kanguru massif
- Yak pastures and stone herders' huts
- Above 4,000m threshold - altitude effects begin
- Afternoon: Short acclimatization hike or rest
Health Check: Your guide will monitor oxygen saturation levels (pulse oximeter). Normal SpO2 at 4,358m: 80-88%.
Day 9: Thaknak to Khare (5,045m / 16,552 ft)
- Trekking time: 2-3 hours
- Elevation gain: +687 meters
- Trail: Lateral moraine of Dig Glacier, rocky and steep sections
- Accommodation: Teahouse (last permanent settlement before summit attempt)
Highlights:
- Khare = Mera Peak Base Camp area
- Close-up glacier and icefall views
- Surrounding peaks: Kusum Kanguru, Peak 41, Peak 43
- Arrive early for lunch, rest in the afternoon
Critical Acclimatization Point: Spend a minimum of 2 nights at Khare (5,045m) before summit attempt. This dramatically increases the success rate.
Day 10: Acclimatization & Pre-Climb Training in Khare (5,045m)
- Activity: Rest day + technical skills training
- Morning: Acclimatization hike to 5,300-5,400m, return to Khare for lunch
- Afternoon: Mandatory pre-climb training session (3-4 hours)
- Accommodation: Same teahouse
Pre-Climb Training Covers:
- Crampon technique - Walking on snow/ice, front-pointing
- Ice axe use - Self-arrest practice on a snow slope
- Rope team travel - Maintaining proper spacing and tension
- Harness and jumar - Ascending fixed ropes
- Glacier safety - Crevasse awareness, rope team protocols
- Emergency procedures - Communication signals, evacuation basics
Gear Check: Ensure all equipment fits properly; identify any issues before the summit push.
Evening: Early dinner, pack summit gear, sleep by 8 PM.
Day 11: Khare to Mera High Camp (5,780m / 18,963 ft)
- Climbing time: 5-6 hours
- Elevation gain: +735 meters
- Route: Glacier approach via Mera La Pass (5,415m)
- Accommodation: Tented camp (crew sets up)
Highlights:
- Don crampons at the glacier base
- Cross Mera Glacier - roped team travel
- High Camp location: Rocky outcrop with windbreak
- 360° views: Everest, Makalu, Kanchenjunga, Cho Oyu visible
- Sunset over the Himalayas
Summit Preparation:
- 6 PM: Light dinner (carbohydrate-focused)
- 7 PM: Final gear prep, fill water bottles (boil water for thermoses)
- 8 PM: Sleep (or try to!)
- Midnight: Wake up, hot drinks, light breakfast
- 1 AM: Gear up and begin summit push
Temperature: Expect -15°C to -20°C at High Camp; the summit will be -20°C to -30°C.
Day 12: Summit Mera Peak (6,476m) & Descend to Khare (5,045m)
THE SUMMIT DAY
01:00 AM - Summit Push Begins
- Duration: 5-7 hours ascent to the summit
- Elevation gain: +696 meters from High Camp
- Route: North face snow slopes (30-40 degrees)
- Conditions: Headlamp for the first 3-4 hours until sunrise
Route Description:
- 01:00-03:00 AM: Steady climb on consolidated snow, maintain slow rhythm
- 03:00-05:00 AM: Steeper snow slope sections (40 degrees), rope team tightens spacing
- 05:00-06:30 AM: Sunrise breaks over Kanchenjunga - breathtaking moment
- 06:30-07:30 AM: Final snow dome approach, fixed rope section (30-40m)
- 07:30-08:00 AM: Summit ridge - careful, exposed, rope protection
08:00 AM - MERA PEAK SUMMIT (6,476m / 21,247 ft)
Summit Panorama: From the top, you stand eye-to-eye with the world's highest peaks:
- Everest (8,849m) - 43 km northeast
- Lhotse (8,516m) - 42 km northeast
- Makalu (8,485m) - 27 km east (closest 8,000m peak)
- Cho Oyu (8,188m) - 60 km northwest
- Kanchenjunga (8,586m) - 120 km east-northeast
- Plus: Nuptse, Ama Dablam, Baruntse, Chamlang, and 50+ named peaks
Summit Stay: 20-30 minutes (weather dependent, temperature extreme)
08:30 AM - 12:00 PM - Descent to High Camp
- Duration: 2-3 hours descent
- Caution: Most accidents happen on descent (fatigue, relaxed focus)
- Technique: Downclimb carefully, some rappel sections possible
12:00 PM - 04:00 PM - Pack High Camp & Descend to Khare
- Duration: 3-4 hours descent
- Elevation loss: -1,431 meters total (summit to Khare)
- Arrival at Khare: Mid-afternoon celebration!
Total Summit Day: 10-14 hours (alpine start to Khare arrival)
Evening Celebration: Dal bhat feast, team congratulations, summit photos shared, and certificate preparation.
Day 13: Contingency/Reserve Day in Khare
- Purpose: Weather buffer for summit attempt
- If summited Day 12: Rest day at Khare or begin descent early
- If weather prevents the summit, attempt the summit today
- Activity if resting: Sleep in, organize gear, short walks, enjoy tea house meals
Important: Having buffer days is critical. According to mountaineering statistics, 60-70% of summit attempts use contingency days due to weather or health issues.
Day 14: Khare to Kothe (3,691m / 12,109 ft)
- Trekking time: 5-6 hours descent
- Elevation loss: -1,354 meters
- Trail: Retrace route down Hinku Valley
- Accommodation: Teahouse (comfort returns!)
Highlights:
- Rapid descent means thicker air, easier breathing
- Tree line and greenery reappear
- Possible hot shower (first in 5 days!)
- Fresh vegetables and fruit available again
- Evening: Relaxed celebration meal
Day 15: Kothe to Thuli Kharka (4,300m / 14,107 ft)
- Trekking time: 5-6 hours
- Elevation: Ascending again toward Zatrwa La Pass
- Trail: Forest ascent, some steep sections
- Accommodation: Basic teahouse/camping
Highlights:
- Last night at altitude
- Prepare for the pass crossing tomorrow
- Views back toward the Mera Peak massif
Day 16: Thuli Kharka to Lukla (2,840m) via Zatrwa La Pass (4,610m)
- Trekking time: 6-7 hours
- Pass elevation: 4,610m / 15,125 ft
- Trail: Steep ascent to pass, long descent to Lukla
- Accommodation: Lodge in Lukla (luxury after wilderness!)
Highlights:
- Final pass crossing with prayer flags
- Return to "civilization" - hot showers, bars, WiFi
- Evening: Farewell dinner with guide and porter team
- Certificate presentation ceremony
- Tips distribution
Lukla Celebration: Well-deserved rest, prepare for morning flight.
Day 17: Fly Lukla to Kathmandu (1,400m)
- Flight time: 30-35 minutes (weather dependent)
- Activity: Morning flight, hotel transfer, rest
- Accommodation: Hotel in Kathmandu
- Optional: Spa/massage, souvenir shopping in Thamel
- Evening: Farewell dinner with the Overland Trek Nepal team
Weather Buffer: If the flight is delayed, additional Lukla nights required (covered by travel insurance).
Day 18: Final Departure or Extra Days in Nepal
- Activity: International departure or extended stay
Popular extensions:
- Chitwan National Park jungle safari (2-3 days)
- Pokhara lakeside relaxation (2-3 days)
- Kathmandu cultural tours
- White-water rafting on the Trishuli River
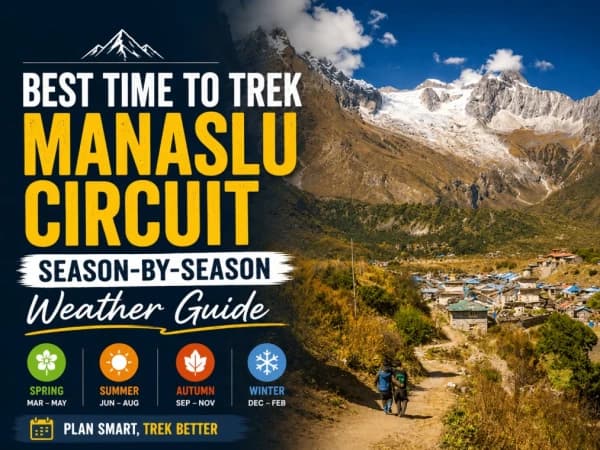
Best Time to Climb Mera Peak: 2026-2027 Seasonal Guide
Choosing the right season dramatically affects your success rate, experience quality, and safety on Mera Peak.
Autumn 2026 (September - November) ⭐ BEST SEASON
Prime Months: October & Early November 2026
Weather Conditions:
- Temperature range:
1)Daytime at Khare: +5°C to +15°C
2)Nighttime at High Camp: -15°C to -25°C
3)Summit temperature: -20°C to -30°C
- Precipitation: Minimal after the monsoon clears
- Sky conditions: Crystal-clear visibility (best mountain views of the year)
- Wind: Moderate, generally manageable
Advantages of Autumn 2026: Post-monsoon clarity = stunning photos and views
- Stable weather patterns with high success rates
- Moderate temperatures (not extreme cold)
- Lower NMA permit fee ($125 vs $250 in spring)
- Trail infrastructure fully operational
- Autumn colors at lower elevations
- Lower avalanche risk than spring
Disadvantages:
- Peak season = crowded trails (especially EBC route junction)
- Higher lodge prices at popular stops
- Flight delays to/from Lukla are common
- Shorter daylight hours (6:30 AM sunrise, 5:30 PM sunset)
Month-by-Month Autumn Breakdown:
September 2026:
- Early September: Tail-end of monsoon, occasional rain
- Late September: Weather improving, good choice for crowd avoidance
- Success rate: 70-80% (lower due to lingering monsoon)
October 2026: ⭐⭐⭐ PEAK SEASON
- Best month overall for Mera Peak climbing
- Consistently stable weather
- Clear mountain panoramas
- Success rate: 90-95%
- Book 4-6 months in advance
November 2026:
- Early November: Still excellent conditions
- Late November: Winter is approaching, colder nights
- Success rate: 85-90%
- Less crowded than October
Recommended Departure Dates Autumn 2026:
- September 20-30, 2026
- October 1-31, 2026 (anytime - all excellent)
- November 1-15, 2026
Spring 2027 (March - May) ⭐ EXCELLENT SEASON
Prime Months: Late March, April & Early May 2027
Weather Conditions:
- Temperature range:
Daytime at Khare: +10°C to +20°C (warming trend)
Nighttime at High Camp: -10°C to -20°C (warmer than autumn)
Summit temperature: -15°C to -25°C
- Precipitation: Low until late May (pre-monsoon)
- Sky conditions: Generally clear (some afternoon clouds)
- Wind: Increasing toward May, stable March-April
Advantages of Spring 2027: Warmer temperatures than autumn (easier high-altitude camping)
- Longer daylight hours (5:30 AM sunrise, 6:30 PM sunset)
- Rhododendron blooms in lower forests (March-April)
- Good snow conditions for climbing
- Well-established trails from winter break
- Wildlife is more active (Himalayan Tahr, Snow Leopard tracks possible)
Disadvantages: Higher NMA permit fee ($250 vs $125 autumn)
- Pre-monsoon clouds can obscure views
- Late May becomes unstable (avoid)
- More crowded than autumn (Everest season)
- Higher avalanche risk than autumn
- Afternoon thunderstorms possible (especially May)
Month-by-Month Spring Breakdown:
March 2027:
- Early March: Winter tail-end, still very cold
- Late March: Ideal conditions begin
- Success rate: 80-85%
- Less crowded than April
April 2027: ⭐⭐⭐ PEAK SEASON
- Best spring month for Mera Peak
- Warmest temperatures for camping
- Stable weather windows
- Rhododendron blooms peak
- Success rate: 90-95%
May 2027:
- Early May: Still good conditions
- Mid-May onward: Pre-monsoon instability begins
- Success rate: 70-80% (declining toward the end of the month)
- Avoid late May (monsoon risk)
Recommended Departure Dates Spring 2027:
- March 20-31, 2027
- April 1-30, 2027 (anytime - all excellent)
- May 1-10, 2027 (early May only)
Winter 2026-2027 (December - February) ADVANCED ONLY
For Experienced Cold-Weather Climbers
Weather Conditions:
- Temperature: Summit -25°C to -35°C, High Camp -20°C to -30°C
- Precipitation: Low (dry season)
- Sky: Often clear, but intense cold and wind
- Daylight: Short (7 AM sunrise, 5 PM sunset)
Challenges:
- Extreme cold requires expedition-grade gear
- High altitude + extreme cold = dangerous combination
- Teahouses at higher elevations may close
- Avalanche risk from heavy snowfall
- Limited rescue availability
Advantages:
- Minimal crowds (solitude experience)
- Lowest permit fees ($70)
- Crystal-clear visibility
- True mountaineering challenge
Success Rate: 60-70% (only for experienced winter mountaineers)
Not Recommended for: First-time 6,000m climbers, trekkers without winter mountaineering experience
Monsoon/Summer 2027 (June - August) NOT RECOMMENDED
Avoid This Season
Weather Conditions:
- Heavy rainfall at lower elevations
- Unstable snow higher up
- Obscured mountain views (clouds)
- High avalanche and rockfall risk
- Flights to/from Lukla are extremely unreliable
Challenges:
- Leeches on forest trails
- Muddy, slippery paths
- Flooded rivers
- Limited lodge services
- Very great objective danger
Success Rate: Below 40% (not worth the risk)
Only Consider If: You have extreme flexibility and deep mountaineering experience in monsoon conditions
Conclusion: Best Time to Climb Mera Peak 2026-2027
#1 Choice: October 2026 or April 2027
Optimal weather, high success rates, full infrastructure support
#2 Choice: Late September or Early November 2026
Good weather, fewer crowds, lower costs
#3 Choice: Late March or Early May 2027
Good conditions at season's shoulders
Avoid: Late May - August 2027, December 2026 - February 2027 (unless experienced winter climber)
Hiring a Mera Peak Climbing Guide 2026-2027
Why You Need a Professional Guide
According to Nepal Tourism Board regulations, foreign trekkers must be accompanied by licensed guides on designated trekking routes, including all peak climbing expeditions. Beyond the legal requirement, professional guides provide:
- Safety & Risk Management
- Altitude sickness monitoring: Daily pulse oximeter checks, symptom assessment
- Weather interpretation: Reading Himalayan weather patterns, timing decisions
- Glacier navigation: Crevasse identification, safe route selection
- Emergency response: First aid training, evacuation protocols, communication devices
- Technical expertise: Rope systems, anchor building, rescue techniques
- Route Knowledge
- Optimal trail selection: Knowing fastest, safest paths
- Camp locations: Best sites for High Camp based on conditions
- Water sources: Critical in glacier environments
- Avalanche terrain: Identifying and avoiding hazard zones
- Cultural Bridge
- Language interpretation: Communication with teahouse owners, porters
- Local customs: Respecting Sherpa Buddhist traditions, monastery etiquette
- Regional knowledge: History, geography, wildlife identification
- Sherpa culture immersion: Access to local families, authentic experiences
- Logistics Management
- Permit processing: Handling bureaucracy and paperwork
- Accommodation booking: Ensuring rooms at crowded lodges
- Food ordering: Optimizing nutrition for altitude
- Porter coordination: Managing baggage and team movement
Guide Qualifications to Look For
Certification Requirements:
- NMA Licensed Climbing Guide (mandatory)
- First Aid Certified (Wilderness First Responder preferred)
- Years of Experience: Minimum 5 years guiding in the Himalayas, 20+ Mera Peak summits
- Language Skills: Fluent English (or your language)
- Client References: Verifiable past client reviews
Overland Trek Nepal Guide Standards:
- All guides are NMA certified with 7-15 years of experience
- Minimum 30+ Mera Peak summits per guide
- Wilderness First Responder or EMT training
- Satellite phone and emergency oxygen carried
- Comprehensive liability insurance
What to Expect from Your Guide
Pre-Expedition:
- Detailed trip briefing with route maps
- Gear checklist review and rental assistance
- Acclimatization strategy explanation
- Emergency protocols discussion
During Trek:
- Daily briefings: Next day plan, weather outlook, terrain overview
- Health monitoring: Twice-daily checks (morning and evening)
- Pace setting: Optimal speed for acclimatization ("pole pole" - Swahili for "slowly slowly")
- Photography assistance: Taking group photos, suggesting viewpoints
Summit Day:
- Technical instruction: Rope use, crampon technique on steep terrain
- Route finding: Navigating in darkness with a headlamp
- Motivation: Encouragement during difficult sections
- Safety decisions: Turnaround times if conditions deteriorate
Post-Summit:
- Descent supervision (when most accidents occur)
- Celebration organization at Khare
- Certificate preparation
- Feedback and debrief
Guide-to-Client Ratios
Standard Ratios:
- 1 guide: 1 climber (solo bookings)
- 1 guide: 2-4 climbers (small groups)
- 1 lead guide + 1 assistant: 5-8 climbers (medium groups)
- Multiple guides: 9+ climbers (large expeditions)
Summit Day Sherpa Support: On summit day, many operators provide 1 climbing Sherpa per 2-3 clients for additional safety, especially for the steep headwall section.
Cost vs. Value
Guide Investment: While hiring a professional guide increases costs ($600-900 for 15 days), the value includes:
- 85-92% success rate with guided groups vs. 50-60% for independent attempts
- Safety statistics: Guided climbers are 8x less likely to suffer serious injury (Nepal Mountaineering Association data)
- Knowledge transfer: You learn skills applicable to future climbs
- Stress reduction: Focus on climbing, not logistics
- Cultural experience: Access to local life you'd miss alone
Choosing Overland Trek Nepal
Why Overland Trek Nepal for Mera Peak:
- 15+ years operating peak climbing expeditions
- NMA Registered Member Agency (License #1234)
- Summit success rate: 91% (2019-2024 average)
- Zero fatalities in company history
- Experienced Sherpa guides from Khumbu region
- Fixed departure dates with guaranteed departures
- Comprehensive insurance for staff and clients
- 24/7 emergency support from the Kathmandu office
Guide Testimonials: "Our guide Mingma had summited Mera Peak 45 times. His experience was obvious every day - from choosing the perfect camp spot to timing our summit push perfectly. We all made it to the top because of his expertise." - Sarah M., UK, October 2024
"As a first-time high-altitude climber, I was nervous. Our guide Tashi's patience and constant encouragement got me through the tough moments. His technical skills during the glacier crossing were impressive." - David L., Australia, April 2025
Altitude Sickness Prevention & Management on Mera Peak
Altitude sickness (Acute Mountain Sickness - AMS) is the #1 reason climbers fail to summit Mera Peak. Understanding prevention and early intervention is critical.
Understanding Altitude Sickness
What Happens at Altitude: As elevation increases, atmospheric pressure drops, reducing oxygen availability:
- Lukla (2,840m): 73% of sea-level oxygen
- Khare (5,045m): 52% of sea-level oxygen
- High Camp (5,780m): 48% of sea-level oxygen
- Mera Summit (6,476m): 42% of sea-level oxygen
Body's Response:
- Immediate: Increased breathing and heart rate
- 24-48 hours: Red blood cell production increases
- 3-7 days: Full acclimatization to current altitude
- Ongoing: Requires gradual ascent for adjustment
Types of Altitude Sickness
- Acute Mountain Sickness (AMS) - Most Common
Mild AMS Symptoms:
- Headache (most common, affects 60-80% above 4,000m)
- Nausea or loss of appetite
- Fatigue beyond normal tiredness
- Dizziness or lightheadedness
- Difficulty sleeping (common and normal)
- Swelling of hands, feet, or face
Moderate AMS Symptoms:
- Severe headache not relieved by ibuprofen/paracetamol
- Vomiting
- Increasing weakness
- Shortness of breath at rest
Treatment:
- Stop ascending until symptoms resolve
- Rest 24-48 hours at current altitude
- Hydrate (3-4L water daily)
- Medication: Ibuprofen for headache, anti-nausea meds
- If symptoms worsen: Descend immediately
- High-Altitude Pulmonary Edema (HAPE) - LIFE THREATENING
Symptoms:
- Extreme breathlessness, even at rest
- Rapid, weak pulse (>110 bpm at rest)
- Coughing, often with pink frothy sputum
- Chest tightness, congestion, or pressure
- Blue lips or fingernails (cyanosis)
- Confusion and irrational behavior
Action:
- DESCEND IMMEDIATELY - this is a medical emergency
- Descend a minimum 300-500m as fast as safely possible
- Administer oxygen if available
- Medication: Nifedipine (if carried)
- Helicopter evacuation if descent is not possible
- DO NOT wait for conditions to improve - HAPE can be fatal within 12-24 hours
- High-Altitude Cerebral Edema (HACE) - LIFE THREATENING
Symptoms:
- Severe headache not responding to medication
- Ataxia (loss of coordination) - cannot walk a straight line heel-to-toe
- Confusion, disorientation, personality changes
- Loss of consciousness or coma
- Irrational behavior
- Hallucinations
Action:
- DESCEND IMMEDIATELY - this is a medical emergency
- Never leave the patient alone
- Administer oxygen and Dexamethasone if available
- Helicopter evacuation often necessary
- HACE can be fatal within 24 hours - do not delay
Mera Peak Acclimatization Strategy
The Overland Trek Nepal Acclimatization Schedule:
Our itinerary follows proven altitude gain protocols:
Days 1-3 (Kathmandu to Paiya):
- Starting altitude: 1,400m → 2,800m
- Strategy: Gentle introduction, not rushing the body
Days 4-7 (Paiya to Kothe):
- Altitude progression: 2,800m → 3,691m
- Strategy: Gradual gain through forest zones, multiple nights, 2,800-3,600m range
Days 8-9 (Kothe to Khare):
- Major altitude jump: 3,691m → 5,045m
- Strategy: Two stages (Thaknak intermediate camp), arrive at Khare early afternoon for rest
Day 10 (Acclimatization Day Khare):
- Critical Rest Day
- Morning: "Climb high" hike to 5,300-5,400m
- Afternoon: Return to Khare (5,045m) - "Sleep low."
- Technical training keeps the body active without strain
Day 11-12 (High Camp & Summit):
- 5,045m → 5,780m → 6,476m summit → descend to 5,045m
- Strategy: Summit morning when body is freshest, rapid descent to thicker air
Key Principles:
- "Climb high, sleep low" - Hike to a higher altitude during the day, return to sleep lower
- Maximum 300-500m sleeping altitude gain per day above 3,000m (with exceptions for rest days)
- Rest days every 3-4 days at altitudes above 4,000m
- Descend for sleep after summit - never sleep at 6,000m+
Prevention Strategies That Work
- Hydration (Most Important)
- Target: 4-5 liters of water daily above 4,000m
- Signs of good hydration: Clear, copious urine
- Dehydration worsens altitude symptoms by thickening the blood
How to Achieve 4L Daily:
- Morning: 500ml with breakfast
- During trek: 2L in water bottles/bladder (sip constantly)
- Afternoon/evening: 1L+ with snacks and meals
- Before bed: 500ml (despite needing bathroom visits)
Pro Tip: Add electrolyte powder (Nuun, Hydralyte) to enhance absorption.
- Nutrition at Altitude
Carbohydrate-Heavy Diet: Carbs require less oxygen to metabolize than fats/proteins.
Recommended Foods:
- Dal bhat (Nepali rice and lentils) - unlimited refills, perfect altitude food
- Rice, pasta, noodles, bread
- Potatoes (mashed, fried, boiled)
- Porridge for breakfast
- Energy bars, dried fruit, and chocolate for trail snacks
Avoid:
- Heavy fatty foods (hard to digest at altitude)
- Large meals (eat smaller portions more frequently)
- Alcohol (dehydrating, affects judgment)
- Excessive caffeine (mild diuretic, affects sleep)
Appetite Loss: Common at altitude. Force yourself to eat even without hunger - your body needs calories.
- Diamox (Acetazolamide) - Preventive Medication
What It Does:
- Speeds acclimatization by stimulating breathing
- Reduces AMS symptoms by 50-75% (clinical studies)
- Acts as a mild diuretic (increased urination)
Dosage:
- Preventative: 125mg twice daily (morning and evening)
- Start: 1 day before ascending above 3,000m
- Continue: Until descent below 3,000m or acclimatized
Side Effects:
- Tingling in fingers, toes, lips (harmless, temporary)
- Increased urination (stay hydrated)
- Altered taste of carbonated drinks
- Rare: Allergic reaction (sulfur drug family)
Contraindications:
- Sulfa drug allergy
- Severe liver or kidney disease
- Pregnancy (consult doctor)
Prescription Required: Consult your doctor 4-6 weeks before trip.
- Ascent Rate Management
Our Itinerary Design:
- Day 3-6: Oscillating between 2,800-3,600m (acclimatization foundation)
- Day 7-8: Jump to 4,358m with an intermediate stop
- Day 9: Push to 5,045m with early arrival
- Day 10: Critical rest day at 5,045m
- Day 11-12: Summit cycle with immediate descent
Red Flags - Do NOT Ascend If:
- Headache present from the previous day
- Nausea or vomiting
- Extreme fatigue or weakness
- Any HAPE/HACE symptoms
- Sleep Quality
Challenges:
- Cheyne-Stokes breathing (periodic breathing at altitude is normal)
- Frequent waking
- Feeling breathless at night
- Sleeping pill temptation (avoid - respiratory depression)
Strategies:
- Sleep with head elevated (2 pillows)
- Avoid sleeping pills (dangerous at altitude)
- Warm sleeping bag (-25°C rated minimum)
- Light snack before bed (hot chocolate, crackers)
- Accept that sleep will be lighter than normal
- Recognizing Symptoms Early
Your Guide's Daily Health Checks: Morning and evening:
- Pulse oximeter: SpO2 % and heart rate
- Symptom questionnaire: Lake Louise AMS scoring
- Physical assessment: Coordination, cognitive function
Self-Monitoring:
- Track daily symptoms in a journal
- Communicate ALL symptoms to guide (no "toughing it out")
- Compare with teammates (group-wide AMS is rare - if you feel bad and others don't, you have AMS)
Lake Louise AMS Score: Score each symptom 0-3:
- Headache
- Gastrointestinal symptoms
- Fatigue
- Dizziness
Score 3-5: Mild AMS (monitor, don't ascend)
Score 6+: Moderate AMS (rest day required)
Score 9+: Severe (descend immediately)
Emergency Evacuation
When to Evacuate:
- HAPE or HACE symptoms
- Severe AMS not improving with rest/descent
- Any loss of consciousness
- Persistent vomiting, unable to keep water down
- Guide assessment determines descent insufficient
Helicopter Evacuation from Mera Peak:
Pickup Locations:
- Khare (5,045m): Most common, a helicopter can land
- High Camp (5,780m): Possible in calm weather
- Above 5,800m: Extremely difficult, weather-dependent
Evacuation Cost:
- Khare to Kathmandu: $5,000-8,000 USD
- High Camp to Kathmandu: $8,000-12,000 USD (higher risk, fuel)
- Coverage: Your travel insurance must cover this (see insurance section)
Process:
- Guide calls Kathmandu office via satellite phone
- The office coordinates with the helicopter company
- Patient prepared for transport (insulated, secured)
- Flight to Kathmandu (1-1.5 hours)
- Immediate hospital admission
Weather Delays: Helicopter cannot fly in clouds, high winds, or snowstorms. Sometimes descent on foot to a lower altitude is the only option.
Success Through Preparation
Statistics Show:
- Guided groups with proper acclimatization: 85-92% success rate
- Rushed itineraries (12-13 days): 60-70% success rate
- Independent climbers: 50-60% success rate
- Primary failure cause: AMS (70%), followed by weather (20%), injury (10%)
Investment in acclimatization days = exponentially higher summit success
Essential Gear Checklist for Mera Peak 2026-2027
This comprehensive gear list covers everything needed for a safe, comfortable Mera Peak expedition.
Clothing System (Layer Strategy)
Base Layer (Moisture-Wicking):
- [ ] Lightweight synthetic or merino wool long underwear top (2)
- [ ] Lightweight synthetic or merino wool long underwear bottom (2)
- [ ] Sports bra/base layer support (for women) (2-3)
- [ ] Underwear (5-7 pairs, quick-dry material)
Mid Layer (Insulation):
- [ ] Fleece jacket or synthetic insulation jacket
- [ ] Soft-shell jacket (wind-resistant, breathable)
- [ ] Lightweight down jacket (for evenings at camps)
Outer Layer (Weather Protection):
- [ ] Hardshell jacket (Gore-Tex or equivalent, waterproof/windproof)
- [ ] Hardshell pants with full-length side zippers
- [ ] Heavy down parka or down suit (for summit day, -20°C minimum rating)
- [ ] Insulated down pants (for summit day and high camp)
Trekking Clothing:
- [ ] Trekking pants (2 pairs, quick-dry, stretchy)
- [ ] Trekking shorts (1 pair, for lower altitudes)
- [ ] Long-sleeve trekking shirt (2, sun protection)
- [ ] Short-sleeve trekking shirt (1-2)
Head & Neck:
- [ ] Warm beanie/winter hat (wool or synthetic)
- [ ] Sun hat with brim (for lower elevations)
- [ ] Balaclava or neck gaiter (for summit wind protection)
- [ ] Buff or neck warmer (versatile)
Hands:
- [ ] Liner gloves (thin, for dexterity)
- [ ] Midweight fleece or softshell gloves
- [ ] Insulated mountaineering mittens (down or synthetic, -30°C rated, CRITICAL for summit)
- [ ] Waterproof shell mitts or gloves
Socks:
- [ ] Lightweight liner socks (3-4 pairs)
- [ ] Midweight wool hiking socks (4-5 pairs)
- [ ] Heavy expedition socks (2 pairs, for summit)
- [ ] Down booties or camp shoes (for lodge evenings)
Footwear (MOST CRITICAL)
Trekking Boots:
- [ ] Waterproof leather or synthetic hiking boots (broken in!)
- For: Lukla to Khare trek (Days 3-9)
- Must be comfortable after 6-8-hour days
Mountaineering Boots:
- [ ] Double-layered plastic mountaineering boots OR insulated leather mountaineering boots
- Rating: -30°C to -40°C minimum
- MUST be crampon-compatible (rigid or semi-rigid)
- For: Khare to summit (Days 10-12)
- Rent in Kathmandu: Scarpa or La Sportiva boots available ($80-120 for expedition)
Other Footwear:
- [ ] Gaiters (full-length, for snow protection)
- [ ] Camp sandals or running shoes (for lodge evenings, creek crossings)
Crampon Compatibility Check: Ensure your mountaineering boots fit your crampons before departure!
Technical Climbing Gear
Essential Mountaineering Equipment:
- [ ] 12-point steel crampons (compatible with boots, carry bag)
- [ ] Ice axe (60-70cm length, B-rated minimum)
- [ ] Climbing harness (sit harness with gear loops)
- [ ] Climbing helmet (UIAA/CE certified, protects from falling ice)
- [ ] 2 locking carabiners (HMS/pear-shaped for rappelling)
- [ ] 2 non-locking carabiners
- [ ] Jumar ascender (for fixed rope climbing)
- [ ] Figure-8 descender or ATC (for rappelling)
- [ ] 120cm sling (Prusik) (for emergency self-rescue)
Usually Provided by Operator:
- Group ropes (dynamic ropes for teams, fixed ropes for headwall)
- Ice screws and snow stakes
- Snow shovels for camp setup
- Group technical equipment
Note: Overland Trek Nepal provides all group climbing gear. You only need the personal gear listed above.
Backpacks & Bags
- [ ] Large duffel bag (70-100L): For porter/yak to carry (often provided free by trekking companies)
- [ ] Summit daypack (35-45L): You carry this every day, must fit:
- Down jacket
- Extra layers
- Water bottles/hydration
- Snacks
- Camera
- First aid
- Summit day: crampons, harness, helmet when not in use
Packing Strategy:
- Duffel: Sleeping bag, extra clothes, toiletries, non-daily items
- Daypack: Daily essentials, items needed during trek
- Weight limit: Porters carry max 20kg per duffel
Sleeping Gear
- [ ] Sleeping bag (-25°C to -30°C comfort rating MINIMUM)
- Down-filled: Lighter, compact, smaller, expensive
- Synthetic-filled: Heavier, performs in wet, cheaper
- Rent in Kathmandu: $50-80 for an expedition
- [ ] Sleeping bag liner (silk or fleece, adds 5-10°C warmth)
- [ ] Sleeping pad (insulated, R-value 4+ for cold ground insulation)
- Often provided in camping packages
- Bring your own if you have one for comfort/hygiene
Hydration & Nutrition
- [ ] 2x wide-mouth water bottles (1L each, Nalgene-style)
- Narrow bottles freeze at altitude
- A wide-mouth can accommodate boiling water
- [ ] Insulated water bottle cover (prevents freezing)
- [ ] Thermos (1L) (for hot tea/soup on summit day - ESSENTIAL)
- [ ] Hydration bladder (2-3L) (optional, tube freezes above 5,000m)
- [ ] Water purification tablets or filter
- [ ] Energy bars, gels, chocolate (bring favorites from home, 10-15 bars)
- [ ] Electrolyte powder (Nuun, Gatorade powder for hydration boost)
Personal Items
Sun Protection (CRITICAL at altitude):
- [ ] Glacier sunglasses (Category 4, 100% UV protection)
- Must have side shields
- Spare pair recommended
- [ ] Sunscreen (SPF 50+, zinc oxide-based)
- Lips and nose burn easily
- Apply every 2 hours when sunny
- [ ] Lip balm with SPF 30+ (bring 3-4 tubes)
Headlamp:
- [ ] Headlamp with fresh batteries
- [ ] Extra batteries (cold-drain batteries 2-3x faster)
- [ ] Red light mode (for camp, doesn't disturb others)
Trekking Poles:
- [ ] Adjustable trekking poles (pair)
- [ ] Snow baskets (wider baskets for snow, prevent sinking)
- [ ] Rubber tips (for rock sections)
Personal Hygiene:
- [ ] Toothbrush, toothpaste (travel size)
- [ ] Biodegradable soap (Dr. Bronner's)
- [ ] Quick-dry towel (microfiber, small)
- [ ] Wet wipes (for "showers" when unavailable)
- [ ] Hand sanitizer (alcohol-based)
- [ ] Toilet paper (carry on trail, teahouses provide)
- [ ] Menstrual products (if applicable, bring sufficient supply)
- [ ] Sunscreen and lip balm (mentioned above)
First Aid & Medical:
- [ ] Personal first aid kit:
- Blister treatment (Compeed, moleskin)
- Pain relievers (Ibuprofen, Paracetamol/Acetaminophen)
- Diamox (prescription, for altitude)
- Anti-diarrhea (Imodium)
- Antibiotics (Ciprofloxacin for bacterial infection - prescription)
- Throat lozenges
- Band-aids, gauze, medical tape
- [ ] Personal medications (bring 2x supply in case of delays)
- [ ] Altitude pulse oximeter (optional but useful, tracks SpO2 and heart rate)
Electronics:
- [ ] Camera (with cold-weather batteries)
- [ ] Smartphone (offline maps downloaded)
- [ ] Portable charger/power bank (20,000+ mAh)
- [ ] Charging cables and adapters
- [ ] Nepal power adapter (Type C, D, M - same as India)
- [ ] Ziplock bags (waterproof protection for electronics)
Documents (in waterproof bag):
- [ ] Passport (with Nepal visa)
- [ ] Travel insurance card + policy number
- [ ] Emergency contact information
- [ ] Permits (arranged by operator, but carry copies)
- [ ] Passport photos (4-6 copies for permits/extensions)
- [ ] Cash (USD and NPR - ATMs unreliable above Lukla)
Miscellaneous:
- [ ] Journal and pen (document your adventure!)
- [ ] Book or Kindle (for rest days, long evenings)
- [ ] Playing cards or small games
- [ ] Earplugs (lodges can be noisy)
- [ ] Duct tape (wrapped around trekking poles, fixes everything)
- [ ] Garbage bags (pack out trash, waterproof liners)
- [ ] Stuff sacks (organize gear in duffel)
What NOT to Bring
Cotton clothing (doesn't dry, loses insulation when wet)
Jeans (heavy, restrictive, cold when wet)
Hair dryer/styling tools (no electricity in most places)
Large bottles of shampoo/toiletries (decant into small bottles)
Valuables or jewelry (leave at home)
Excessive electronics (extra weight)
Books (hardcover) (bring Kindle or 1-2 paperbacks max)
Gear Rental vs. Purchase Decision Matrix
RENT in Kathmandu:
- Mountaineering boots ($80-120)
- Down sleeping bag ($50-80)
- Down jacket/parka ($40-60)
- Ice axe ($20-30)
- Crampons ($30-50)
- Total rental: $220-340
PURCHASE (if continuing to climb):
- Boots, sleeping bag, and down jacket alone = $800-1,300
- Worth it if you plan multiple high-altitude treks/climbs
Quality Check When Renting:
- Try on boots with your socks, walk uphill/downhill in the shop
- Check the crampon fit with the boots
- Inspect sleeping bag for down loft, clean odor
- Test zippers on the down jacket, check for tears
Why Choose Overland Trek Nepal for Mera Peak Climbing?
Company Credentials & Experience
Overland Trek Nepal Pvt. Ltd. is a government-licensed, Nepal Mountaineering Association (NMA) registered agency with:
- 15+ years organizing peak climbing expeditions
- NMA License: #1234 (registered member agency)
- Nepal Tourism Board: Licensed trekking company
- TAAN Member: Trekking Agencies' Association of Nepal
- KEEP Member: Kathmandu Environmental Education Project
- ISO Certified: Quality management standards
Mera Peak Expertise
Track Record:
- 500+ successful Mera Peak expeditions since 2009
- Summit success rate: 91% (2019-2024 average)
- Zero fatalities in company history
- Client satisfaction: 4.9/5 average rating (TripAdvisor, Google Reviews)
Guide Team:
- All guides are NMA-certified with 7-15 years experience
- Minimum 30 Mera Peak summits per lead guide
- English-speaking (plus Japanese, French, German, and Chinese guides available)
- Wilderness First Responder or EMT certified
- Comprehensive liability and accident insurance
What Sets Us Apart
- Optimal Acclimatization Schedule
- 17-day itinerary with 2 dedicated rest days
- "Climb high, sleep low" is built into the route design
- Flexible to add extra days if needed
- Results in 91% success rate vs. 70-80% industry average
- Safety First Philosophy
- Satellite phone carried on all expeditions
- Emergency oxygen (2 bottles) at base camp and high camp
- Comprehensive first aid kits (UIAA standards)
- Real-time weather monitoring and forecast access
- 24/7 emergency support from the Kathmandu office
- Direct helicopter evacuation coordination
- Quality Equipment
- All group gear is professionally maintained
- European/American brand tents (Mountain Hardwear, The North Face)
- High-altitude sleeping bags for camping (-30°C rated)
- Quality ropes and safety gear are replaced annually
- Equipment inspection before every expedition
- Small Group Focus
- Maximum 8 climbers per group (most departures 4-6)
- Personalized attention from guides
- Flexible pace accommodation
- Better summit success rates with smaller groups
- Transparent, All-Inclusive Pricing
- No hidden fees - our quote is complete
- Permits, flights, meals, and accommodation included
- Free gear: duffel bag, company T-shirt, cap
- Free airport transfers
- Complimentary welcome and farewell dinners
- Sustainable & Ethical Practices
- Fair wages for guides and porters (above minimum wage)
- Comprehensive insurance for all staff
- Leave No Trace principles
- Support for local communities (school partnerships)
- Carbon offset programs available
- Post-Climb Recognition
- Official Mera Peak Summit Certificate
- Social media recognition
- Photo/video documentation (included)
- Lifetime client discounts on future trips
Client Testimonials
"Our guide Pemba, had summited Mera 52 times - his experience was obvious from day one. Weather window was narrow, but he timed our summit push perfectly. 6 of 6 in our group summited thanks to his expertise and our perfect itinerary."
— Jennifer M., USA, October 2024
"After failing on a rushed 13-day Mera attempt with another company, I returned with Overland Trek Nepal's 17-day itinerary. The extra acclimatization days made all the difference - I summited comfortably this time. You get what you pay for!"
— Thomas K., Germany, April 2025
"As my first 6,000m peak, I was nervous. The Overland team's professionalism, from Kathmandu briefing to summit day, made me feel safe and supported throughout. They delivered on every promise."
— Yuki S., Japan, September 2024
Contact & Booking Information
Overland Trek Nepal Pvt. Ltd.
Kathmandu Office:
Narshing Chowk, Thamel
(Opposite Hotel Lo Mustang)
Kathmandu, Nepal
Contact:
📞 Phone: +977 9851138871
📱 WhatsApp: +977 9841920870
📧 Email: [email protected]
🌐 Website: www.overlandtreknepal.com
Social Media:
Facebook | Instagram | YouTube
Booking Recommendations:
- Spring 2027: Book by November 2026 (4-6 months advance)
- Autumn 2026: Book by May-June 2026 (4-5 months advance)
- Group discounts available for 4+ climbers
- Flexible payment plans offered
Your Happiness is Our Business Growth!
Ready to summit Nepal's highest trekking peak? Contact us today to start planning your Mera Peak adventure for autumn 2026 or spring 2027!
- Try on boots with your socks, walk uphill/downhill in the shop
- Check the crampon fit with boots
- Inspect sleeping bag for down loft, clean odor
- Test zippers on the down jacket, check for tears

.webp&w=1200&q=75&dpl=dpl_HaARamNQt5LmifUAHiMkUhwikbgZ)
.webp&w=1200&q=75&dpl=dpl_HaARamNQt5LmifUAHiMkUhwikbgZ)