Climb the Highest Peak, Mera – 14-Day Mera Peak Expedition in Nepal
Embark on the Mera Peak expedition and conquer Nepal’s highest trekking peak in just 14 days! “Climb the Highest Peak, Mera” isn’t just a slogan – it’s an invitation to adventure in the Himalayas. This Mera Peak trekking and climbing journey is designed for enthusiastic beginners and seasoned trekkers, combining thrilling high-altitude challenges with rich cultural experiences.
Overland Trek Nepal’sexpert Sherpa guides will lead you through remote valleys, over high passes, and onto the snow-capped summit of Mera Peak (6,476 m/21,247 ft). Along the way, you’ll be immersed in the beauty of the Hinku Valley’s forests and villages, enjoy panoramic views of five 8,000-meter giants from the summit (including Everest and Makalu), and create lifelong memories. Our 14-day Mera Peak trekking itinerary from Kathmandu is carefully crafted to maximize acclimatization, safety, and enjoyment, ensuring that climbing Mera Peak in Nepal is achievable even if it’s your first Himalayan peak. Get ready for an adventurous and engaging journey to the top of Mera – an experience that stands out among all peak climbing in Nepal 2025!
Main highlights of Mera Peak
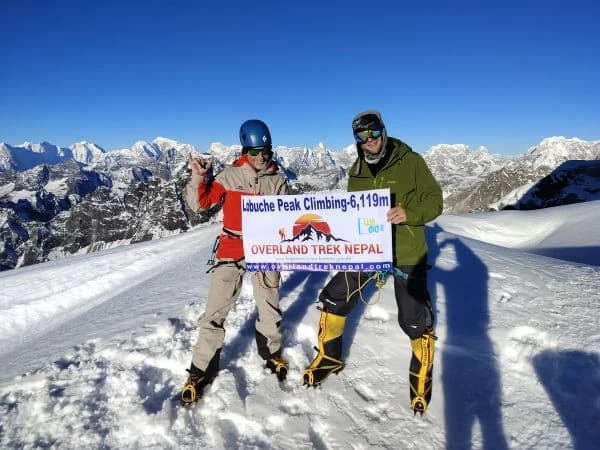
- Summit Nepal’s highest trekking peak, Mera Peak in Nepal, offering bragging rights and a major personal achievement for climbers reaching its summit.
- Stunning Panoramic views of the world’s tallest mountains – Everest, Lhotse, Cho Oyu, Makalu, and Kanchenjunga from the top of the Mera Peak.
- The non-technical climb for beginners, a perfect introduction to high-altitude mountaineering.
- Trek through the wild Hinku Valley, a less-traveled route compared to Everest Base Camp. Cross the dramatic Zatrawala Pass, draped in prayer flags, hike past yak pastures and rhododendron forests, and stay in rustic Sherpa teahouses.
Overview of Climb Highest Peak Mera
Mera Peak (6,476 m) – often called the highest trekking peak of Nepal – is a magnet for adventure seekers. But what does “Climb the Highest Peak, Mera” actually involve? In this overview, we paint a picture of the expedition’s character, from the moment you arrive to the triumphant summit and return.
Picture yourself landing in Kathmandu, the vibrant capital of Nepal, brimming with temples and trekkers. After meeting our team and prepping gear, you take a short, thrilling flight to Lukla – the gateway to the Everest region. Your journey to Mera begins here, diverging from the busy Everest Base Camp trail into the tranquil wilderness of the Hinku Valley. The Mera Peak expedition is as much a cultural trek as a climb: you’ll trek for several days through picturesque Sherpa villages like Chutang, Kothe, and Thagnak (Thangnak), exchanging smiles and “Namaste” greetings with locals. Colorful prayer flags and chortens (stone stupas) dot the trail, signifying the deep Buddhist heritage of the region.
The route leads you over Zatrwa La Pass (4,610 m), an achievement in itself. Standing atop this windy pass, you’ll catch your first glimpse of Mera Peak in the distance – a white sentinel among the clouds. Descending into the Hinku Valley, each day brings you closer to Mera. You’ll follow river valleys and glacial moraines, witnessing a dramatic change in landscape from lush forests at lower elevations to alpine meadows and eventually the icy realm above 5,000 m.
Mera Peak Base Camp is at Khare (around 5,045 m), a cluster of lodges that serve as the staging ground for climbs. Here, excitement builds as you undergo a pre-climb training session. Our guides will teach and refresh mountaineering basics: how to walk with crampons on ice, use an ice axe, clip into fixed ropes with a jumar, and abseil with a figure-eight device. If you’re new to climbing, this training is empowering and eases any nerves. Even experienced climbers appreciate the refresher.
From Khare, the climb gets real. You ascend to a high camp at 5,800 m, leaving behind the last teahouses and sleeping in expedition tents on the snow. The support crew melts snow for drinking water and serves a hot meal as you settle in early. The stars at high camp feel startlingly close – a glittering blanket overhead as you doze off with butterflies in your stomach for the big day.
Summit day begins well before dawn, typically around 2 AM. In the darkness, you gear up in the cold: headlamps bobbing, crunched footsteps on frozen snow. Rope up and follow your Sherpa guide into the night. The path is a steady climb on a broad glacier, winding around crevasses. As altitude challenges your breath, you employ the slow, steady rest-step technique and pressure breathing to keep moving. The eastern horizon starts to glow as you approach the final summit slope. In some seasons, a short, steep pitch of about 30–40 meters below the summit requires the use of a fixed rope – your guide will secure you, and you’ll use your jumar to ascend this last hurdle.
Then suddenly, you’re there – the summit of Mera Peak! The sun breaks over a sea of mountains. In every direction, Himalayan peaks pierce the sky. Mount Everest (8,849 m) stands proudly to the north, accompanied by its neighbors Lhotse and Cho Oyu. To the east, Makalu (8,485 m) and the distant Kanchenjunga (8,586 m) hover on the horizon. Few viewpoints in Nepal rival this one. You take triumphant photos with prayer flags at the summit, feeling on top of the world (quite literally on top of Nepal’s trekking peaks). For many, this is an emotional moment – a first 6,000 m summit, the culmination of days of effort and months of training. Beginners prove to themselves that with determination and the right support, they can climb a Himalayan mountain.
After soaking in the panorama and perhaps enjoying a celebratory chocolate bar at 6,476 m, you begin the descent. The journey isn’t over – you must carefully retrace steps down the glacier, return to high camp to pack up, and continue down to thicker air. Fortunately, descending is faster, and with each meter lost, breathing gets easier. Back down at Khare or Kothe that evening, the team often holds a small celebration: maybe a cake or simply a round of hot tea and hearty laughter, reliving the climb’s highlights.
Over the next couple of days, you’ll trek out via the same scenic route, crossing the Zatrwa La Pass once more to exit the valley. Finally, a short flight whisks you from Lukla back to Kathmandu. In just two weeks, you’ve gone from city to summit and back – what a journey!
Throughout the trip, safety and comfort are prioritized. The itinerary is crafted to allow for proper acclimatization (with rest days above 4,000 m) and includes a contingency day for summit attempts if weather delays occur. Our Sherpa-guided mountain climb approach means you’re in very capable hands: our guides are seasoned experts who know the mountain inside out and are trained in altitude first aid and rescue. They’ll be by your side, encouraging you on tough ascents, monitoring your health (with tools like oximeters for altitude sickness symptoms), and ensuring a safe climb.
In summary, the Climb the Highest Peak, Mera expedition is a thrilling blend of trekking and climbing. You’ll trek through diverse landscapes, engage with local culture, and ultimately rope up for an attainable Himalayan summit. It’s adventurous and engaging at every step – a journey that pushes your limits in a supportive way. The following section breaks down the itinerary day by day to show you exactly how this 14-day Mera Peak adventure unfolds.
Mera Peak Climbing is the most demanding peak in Nepal.
Mera Peak is often dubbed the “highest trekking peak” in Nepal, but is it also the most demanding? The answer depends on how we define “demanding.” In terms of altitude, yes, Mera Peak’s summit at 6,476 m is physically demanding – it’s higher than any other trekking peak, meaning your body endures more days in thin air. However, in terms of technical difficulty, Mera is one of the more straightforward climbs, which is why it’s popular for beginners looking to step into mountaineering. Let’s break down the aspects of demand:
- Endurance: Climbing Mera requires excellent cardiovascular endurance. You’ll be trekking for many days and summiting at high altitude, so your stamina is tested. Summit day can be 8–10 hours of strenuous effort. This makes Mera a demanding endurance challenge, even though it isn’t technically complex. Beginners often find the length of the trek and summit push to be a true test of their perseverance. Good physical preparation (cardio training, long hikes) is essential to meet this demand (see “Training for the Mera Peak Expedition in 14 Days” below for tips).
- Altitude: Being the highest trekking peak means altitude sickness is a real concern. Mera’s elevation profiles are demanding on your acclimatization schedule. At 6,000+ meters, every step can feel exhausting. Our itinerary is designed to mitigate this with rest days and a gradual ascent. But compared to lower peaks or treks like Everest Base Camp (5,364 m), Mera is more likely to push your acclimatization limits. Some might say this makes Mera one of the more demanding treks in Nepal in terms of how your body copes with altitude. Proper acclimatization and listening to your body are non-negotiable.
- Technical Difficulty: On the flip side, Mera is non-technical climbing. This means you generally do not need advanced mountaineering skills like pitched ice climbing or rock climbing. The route is mostly a walk on a glacier (with rope and crampons), with a short steep section near the summit where fixed ropes are used. In comparison, some lower elevation “trekking peaks” like Island Peak (6,189 m) or Lobuche East (6,119 m) have more technically demanding sections (like steeper ice walls or ladder crossings). So Mera might be high, but in technical demand it is moderate. It’s sometimes referred to as one of the “easiest” peaks of its height. That said, easy is relative – you still need to learn how to handle ice axe and crampons, and glacial travel has inherent risks (crevasses, changing conditions). The lack of technical difficulty is what makes many first-time climbers gravitate to Mera.
- Remote Logistics: Mera Peak’s trail is more remote and less supported by infrastructure than, say, the Everest Base Camp trail. Fewer teahouses, less cellular connectivity, and fewer fellow trekkers. This means you and the team need to be a bit more self-sufficient, which can be mentally demanding. You won’t find many facilities or quick evacuation points in the Hinku Valley – everything relies on our planning and local support. This remoteness adds to the “demanding” nature in a logistical sense, but it’s also part of Mera’s allure (pristine nature, fewer crowds).
In summary, Mera Peak is demanding in altitude and endurance, but not the most technically demanding peak in Nepal. It earns the superlative of “highest trekking peak” primarily due to height, not difficulty. Many climbers who summit Mera comment that the toughest part was dealing with the cold pre-dawn start and the slog in thin air, rather than any technical obstacle. The mountain’s challenge is as much psychological (keeping oneself motivated and handling potential altitude discomfort) as it is physical.
To put it in perspective: Mera is an ideal training ground. If you can summit Mera and enjoyed the journey, you’ve proven you can handle high altitude, which might encourage you to tackle more demanding peaks or even attempt other expeditions. But if someone is looking for the most technical or grueling peak climb in Nepal, they might look towards higher technical peaks or “expedition peaks” above 7,000 m (which require extensive climbing skills and are outside the trekking peak category).
Overland Trek Nepal ensures that while Mera Peak is demanding, it’s attainable. We focus on proper acclimatization, have a strong support crew to carry heavy loads so you can conserve energy, and provide training to overcome the technical aspects. Many first-time climbers are surprised at how enjoyable the climb is when managed well – yes, it pushes you, but it’s within reach.
So, is Mera Peak the most demanding peak in Nepal? It’s the highest of the “easy” ones, but there are certainly harder climbs if we consider technical grade. For a novice mountaineer, though, Mera will likely be one of the most demanding things you’ve ever done – and that’s exactly what makes the summit victory so rewarding.
Difficulty of the highest trekking peak, Mera Peak
The difficulty of Mera Peak can be described across a few dimensions: altitude, terrain, technical skills required, and overall trek conditions. Understanding the difficulty helps you prepare mentally and physically. Let’s break down what makes Mera Peak challenging and also what makes it manageable:
- High Altitude Challenges: We cannot overemphasize that altitude is the main source of difficulty on Mera. At 6,476 m, the oxygen level is about 47% of that at sea level. You will feel this. Simple tasks like tightening your backpack straps or even walking on flat ground can leave you winded near High Camp. Altitude can also cause Acute Mountain Sickness (AMS) if you ascend too fast. Symptoms might include headache, nausea, fatigue, and disturbed sleep. Our itinerary is crafted to minimize this risk, but each person acclimatizes differently. The key difficulty is moving at high elevations for sustained days. We include acclimatization days and a conservative ascent profile (no big jumps without rest) to address this. It’s also why physical fitness is important – the fitter you are, the more efficiently your body can work with less oxygen.
- Long Summit Day: Mera’s summit day is long and demanding. Typically, you’ll start around 2 AM from ~5,800 m (High Camp) and climb ~700 m to the summit, then descend to 5,000 m or even 4,300 m that same day. That can mean 8–10+ hours on your feet at extreme altitude. You’ll be dealing with pre-dawn cold (often -20°C wind chill or lower), and likely trudging through snow for hours. This requires both physical endurance and mental resilience. Many climbers hit a wall around dawn due to fatigue; overcoming that and pushing towards the summit despite tired legs and thinning air is a challenge. However, because the slope isn’t very steep (until the end), you can go at a measured pace – it’s a marathon, not a sprint. We encourage the “pole pole” (slowly, slowly) approach, and our guides set a sustainable pace. So, difficulty-wise, it’s tough but doable with the right mindset – you settle into a rhythm, and it becomes almost meditative.
- Technical Skill Level: As noted, Mera Peak is classified as a trekking peak with basic alpine PD (Peu Difficile – “a little difficult”) grade. This implies that technical difficulty is relatively low. You won’t be rock climbing or scaling vertical ice walls. The route is mostly on a glacier with a moderate incline. Technical challenges include:
- Glacier Travel: You’ll traverse crevassed areas roped up. This is more about caution than skill – following the guide’s footsteps, using a rope for safety. Crevasses on Mera’s standard route are usually avoidable and well-known; in peak season, paths circumvent them, or snow bridges are established. But you do need to be attentive – a misstep could be hazardous. Your guides will ensure safety by probing and guiding the way.
- Crampon and Ice Axe Use: Walking with crampons on ice or firm snow requires some practice (hence the training day). You need to place your feet a bit wider to avoid snagging your pant legs and maintain balance on slick surfaces. Using an ice axe for support and self-arrest (stopping yourself if you slip) is a safety skill – we train for it. However, on summit day, if all goes well, you won’t slip significantly to need arrest, as the gradient is gentle and you’ll be roped. It’s mostly a just-in-case skill.
- Fixed Rope Climbing: The last 30–50 m to the summit often has a fixed rope. Using a jumar ascender and doing a short, steep climb can be tiring, but it is not overly technical. Think of it as climbing a ladder or a very steep snow slope with backup. Many first-timers handle it fine after the practice session. Our Sherpa guides usually go first to manage the rope and then coach you up one by one.
There is no technical rock scrambling on the normal route – you won’t need rock anchors or to worry about rockfall if you stay on route (the face is mostly snow; rockfall isn’t common on the broad slopes of Mera like it is on some narrow gullies on other peaks).
Overall, in terms of mountaineering difficulty, Mera is considered easy to moderate. The Nepal Mountaineering Association classifies peaks by grade, and Mera’s normal route doesn’t require advanced techniques like hanging off ice cliffs.
- Physical Fitness Required: You don’t need to be a mountaineer to climb Mera, but you should be a strong trekker. The difficulty here is building enough fitness to trek 5–7 hours for multiple days in a row and handle a big summit push. Leg strength and endurance are key. The trek’s difficulty is akin to doing something like the Everest Base Camp trek, but then adding a summit climb on top. If you’ve trekked to 5,000 m with relative comfort, you have a baseline. If not, consider that a goal – at least train with multi-day hikes or long uphill walking sessions. The demand on your body is cumulative; some people feel progressively more tired each day due to the caloric burn and altitude, so keeping yourself fueled and rested is part of the challenge. Mera doesn’t require you to carry heavy loads – our porters do that – so the difficulty is not in backpack weight, but rather the journey itself and altitude.
- Mental Challenge: Climbing any high peak is as much mental as physical. There will be moments of doubt or wanting to quit – maybe when you wake up shivering at 2 AM, or when a headache hits at high camp, or simply the monotony of putting one foot in front of the other on summit night when you can’t see the end. The difficulty here is staying positive and determined. Our group environment helps: the encouragement of guides and camaraderie among team members can pull you through rough patches. We also keep you informed – knowing why we do certain things (like acclimatize or turn around if the weather is bad) helps manage expectations and mental strain.
- Weather and Temperature: Mera’s difficulty can spike if the weather turns poor. High winds, heavy snow, or whiteout conditions can make progress very hard or unsafe. We try to schedule climbs in the best weather windows (spring and autumn – see “Best Time to Climb Mera Peak” below). However, even in good seasons, a sudden storm or cold front can make it extremely challenging (imagine -25°C temperatures with wind while you’re trying to jumar up a rope – that’s hard!). Part of the difficulty is being prepared to endure cold and possibly adjusting plans for the weather. Always follow gear recommendations (especially a good down jacket, gloves, and boots) to mitigate this. With proper gear, the cold is manageable; without it, it can be brutal.
In conclusion, the difficulty of Mera Peak is moderate for a climber but high for a trekker. It straddles the line between trekking and mountaineering. For someone who has done high-altitude treks, Mera adds just a bit more in terms of altitude and a taste of climbing. Many consider it a beginner mountaineer’s peak – difficult enough to feel truly accomplished, but not so hard that it requires years of experience. Summiting Mera Peak will push you, but it’s achievable with preparation and a will to reach the top.
A good way to frame it is: if you approach Mera as the expedition it is, train well, listen to your guides, and go slow, the difficulty becomes part of the adventure rather than an insurmountable obstacle. And when you’re standing on that summit with the world at your feet, every difficult step will have been worth it.
Zatrawala Pass during Mera Peak Trek
The Zatrawala Pass (also spelled Zatrwa La, Zatrwa Pass, or Zatwar La) is a significant milestone on the Mera Peak trek. It’s not just a literal high point on the approach, but also a figurative gateway to the remote Hinku Valley where Mera Peak lies. Here’s what you need to know about this pass and its role in the journey:
- Altitude and Location: Zatrawala Pass sits at about 4,610 meters (15,125 ft) elevation. It is located to the south of Lukla, connecting the area near Chutanga/Chhatra Kharka on the west side and the Hinku Valley (Thuli Kharka) on the east side. When you climb the pass, you are essentially crossing over the rugged Kalo Himal ridge. This is the highest point you reach before you actually start the Mera Peak climb itself.
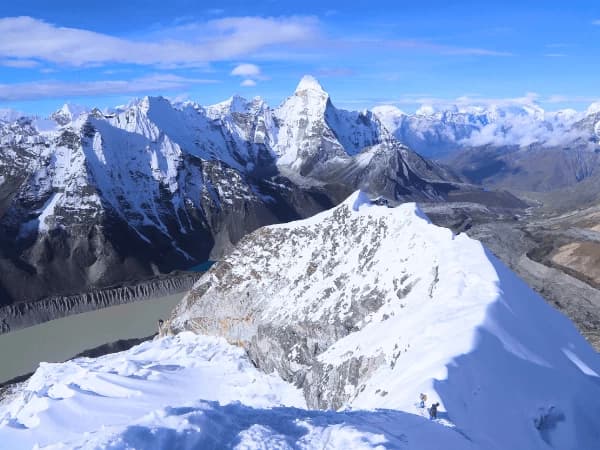
- Terrain and Scenery: The approach to Zatrwa La from Chutanga is a steep ascent through alpine terrain. Initially, you hike through dense forests of pines and rhododendrons; as you near the top, vegetation thins out to mosses and lichens, and eventually just rocks and perhaps snow. There are sections where the trail zigzags up, and you may find some parts with prayer flags or cairns guiding the way. Reaching the top, you’ll likely see a cairn festooned with prayer flags, marking the pass, as is custom in Nepal for high passes. From the top of Zatrwa La, the views are outstanding. Notably, you get your first view of Mera Peak from here if the weather is clear – a thrilling moment as the mountain comes into sight. You can also look back toward the Everest region (Kongde Ri, Numbur Himal, and other peaks). It’s a photogenic spot and a rewarding climb.
- Weather and Conditions: Because of the altitude, Zatrwa La can be under snow even in late autumn or early spring. In peak trekking seasons (Oct/Nov, Mar/Apr), expect cold temperatures at the top and possibly a dusting of snow or ice on the trail. In winter, the pass is often closed or dangerous due to deep snow. Even in good seasons, a sudden snowfall can make the rocky path slippery. Trekkers sometimes carry micro-spikes or use poles for stability if there’s ice. The winds can be strong at the pass – windproof clothing is important on the day you cross. Our guides will typically start early to cross the pass before afternoon clouds or winds pick up.
- Difficulty: Crossing Zatrawala Pass is often reported as one of the more challenging days of the trek (aside from summit day) due to the significant ascent. You gain roughly 1,500 m from Lukla (or 1,100+ m from Chutanga) to the pass in a short distance – that’s steep! It’s a test of your trekking fitness and also a first test of altitude for your body. We often see how trekkers handle 4,600 m here, which can indicate how they might fare higher up. There’s no technical aspect (it’s a walking path, no climbing gear needed here), but endurance and acclimatization are key. That’s why sometimes itineraries include a rest or acclimatization hike around Chutanga before crossing (depending on how people feel). Our 14-day plan has you go for it on Day 3; it’s doable, but we adjust the pace. Plenty of breaks, and the team sticks together. Reaching the top, as mentioned earlier, feels like a victory in itself.
- Significance for Acclimatization: The interesting thing about Zatrwa La is that it forces you high early (to 4,600 m on Day 3), but then you descend to 3,600 m (Kothe) by Day 4. This is a classic acclimatization tactic: “climb high, sleep low.” By going up to the pass and then dropping down, your body gets a strong stimulus to produce red blood cells and adapt, but you spend the night at a safer lower altitude, which helps recovery. This early high point can actually aid acclimatization for later on. That said, some people do feel minor AMS symptoms at Thuli Kharka (4,300 m) after the pass – a slight headache or poor sleep – but once we descend to Kothe the next day, those usually resolve. It’s part of the carefully planned altitude profile.
- Alternate Routes (avoiding Zatrwa La): There are alternative ways to reach the Hinku Valley that avoid Zatrwa La, such as trekking via the villages of Paiya, Panggom, and joining the Hinku Valley further south. Those routes take longer (hence our note that some itineraries can be 18-20 days). They don’t require crossing a 4,600 m pass so early, thus some consider them “easier on acclimatization,” but they involve more days of ups and downs and perhaps more distance. Our itinerary chooses Zatrwa La because it’s the shortest route and, for fit trekkers, it’s efficient and actually beneficial as discussed. However, if someone were unwell or the weather blocked the pass, we could consider those routes. Overland Trek Nepal monitors trail conditions; normally, Zatrwa La is a safe bet in the main seasons and a beautiful introduction to high trekking.
- Descent and Return: When coming back, crossing Zatrwa La again (Day 13) has a different feel. You’ll likely be much stronger and fully acclimatized by then, making the climb up from Thuli Kharka easier than the first time. Also, emotionally, that second crossing signals the near-end of the adventure. Many climbers carry a small extra prayer flag or kata (scarf) to leave at the pass on the return, as a gesture of thanks for a safe journey. From the top on the way back, you can gaze one more time towards Mera and mentally say goodbye, then descend towards Lukla with the knowledge that hot showers and celebration await.
In summary, Zatrawala Pass is a highlight of the Mera Peak trek. It’s challenging but rewarding, providing acclimatization, views, and a sense of the wild terrain you are venturing into. Trekkers often remember this pass almost as fondly as the summit – it stands as a key accomplishment on the route. With our experienced guides, you will cross it safely, and the feeling of standing atop Zatrwa La, looking into the distant valleys that hide Mera Peak, is truly exhilarating.
Training for the Mera Peak expedition in 14 Days
While the Mera Peak trip itself is 14 days, training for the Mera Peak expedition should begin well before you land in Kathmandu. “14 Days” in the context of training likely refers to focusing your training efforts in the last two weeks leading up to the climb (though ideally, you start earlier). That said, let’s consider both pre-expedition training and the acclimatization/training built into the 14-day itinerary.
Pre-Expedition Training (Physical Preparation):
To comfortably climb Mera Peak, a solid fitness base is crucial. You don’t need to be a super athlete or mountaineer, but you should be in good shape aerobically and have decent strength and stamina. Here’s a breakdown of how to train:
- Cardiovascular Endurance: Emphasize aerobic activities. Aim for at least 3–4 training sessions per week in the months leading up, focusing on cardio. Good exercises include:
- Hiking (with a backpack): If you have hills or mountains nearby, do day hikes on weekends. Gradually increase the distance and altitude gain. Try to simulate trek conditions by carrying a 5–8 kg backpack and wearing the boots you’ll use. If you can do a 6-8 hour hike gaining 1000 m in a day without feeling destroyed, that’s a great benchmark.
- Running or Jogging: If you’re a runner, doing 5–10 km runs multiple times a week builds lung capacity and leg endurance. Intermix steady-state runs with some hill sprints or interval training to improve your VO2 max (oxygen use efficiency).
- Cycling or Swimming are excellent low-impact cardio workouts if running isn’t your thing. Swimming is great for full-body endurance and lung capacity; cycling builds leg strength and stamina, too (plus, if you cycle uphill, that’s similar to constant uphill trekking).
- Stair Climbing: If you live in a city, put on a weighted pack and climb stairs in a tall building or use a StairMaster at the gym. This simulates uphill trekking very well. Try to do long sets (20-30 minutes continuous stair climbing) to mimic the sustained nature of uphill hikes.
Aim to be able to engage in cardio exercise for at least 1–2 hours at a time comfortably, as trekking often involves that much continuous walking before a break.
- Strength and Endurance Training: While you don’t need a bodybuilder’s strength, some muscle conditioning helps prevent fatigue and injuries:
- Focus on leg muscles: quads, hamstrings, glutes, and calves. Exercises like squats, lunges, step-ups (especially onto a box or step to simulate stepping up on rocks), and leg presses can help. Higher reps (12-15) with moderate weight improve endurance.
- Core strength: A strong core (abs, lower back) helps with balance on uneven terrain and carrying a pack. Planks, sit-ups, and back extensions are good. Yoga or Pilates can be useful for core and flexibility.
- Stamina: Circuit training or high-intensity interval training (HIIT) can boost overall stamina. For instance, combine aerobic and strength moves in one workout – e.g., do jumping jacks or burpees, then step-ups, then push-ups, then run 400m, repeat. These conditions allow your body to recover quickly, similar to how on the trek, you might have bursts of steep climbing, then easier bits.
- Altitude Training (if possible): Most people won’t have access to high-altitude environments, but if you do (like living in or near mountains), train high. Or use stair/climbing gyms with an altitude mask or altitude simulation chamber (some gyms have those). It’s not essential, but it can give a small edge. Regardless, doing hikes at altitude (say 3,000 m or higher, if feasible) will help your confidence and acclimatization response.
- Pack & Boots Practice: Train with the gear you’ll use. Do some hikes in your mountaineering boots or trekking boots to break them in and get your feet accustomed. Blisters and foot fatigue are something you want to sort out before the trip. Also, practice using trekking poles if you haven’t before – they can save your knees big time on descents.
- Gradual Build and Specificity: Start training 3–6 months out, depending on your baseline fitness. Increase intensity gradually to avoid injury. The last month before departure, try to get as specific as possible (lots of hiking with a pack, back-to-back long days to mimic trek fatigue). Then taper off in the final week – don’t overtrain just before the trip; allow your body to rest so you start fresh.


.webp)